Butterick 5882 Pattern Review
Hello, dear Readers!
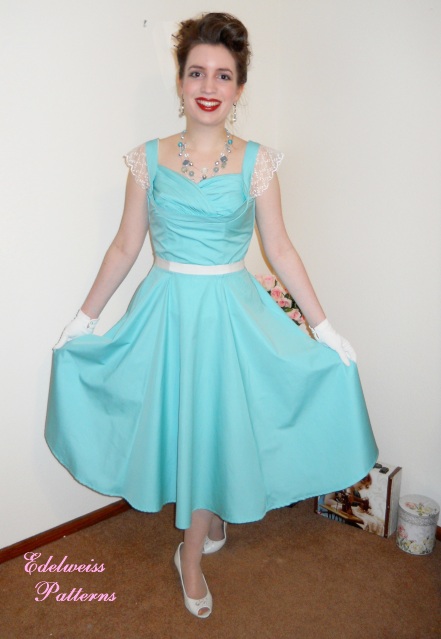
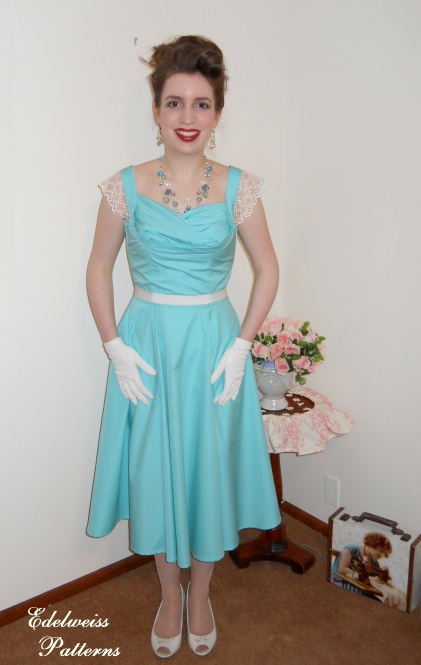
It’s been a crazy day around here! I managed to whip out the very first version (and pattern review!) of the brand new 1950s Butterick Retro pattern designed by Gertie –Butterick 5882! (Gertie, of course, is probably the most famous sewing blogger in the world and just recently started designing patterns for Butterick’s retro line.)
You may remember how when her very first 1950s pattern came out last summer, I got the first pattern review online of that coat in about a week! This time, I had my pattern shipped Express mail and had the dress sewed and photographed on the same day I received the pattern in the mail. Hooray! The pattern only came out on Wednesday, and I just finished this dress today – on Saturday! (It’s at times like these that I’m glad I keep a good “stash” of fabric on hand – this particular piece is a pima cotton sateen which has an incredibly crisp feel to it. )
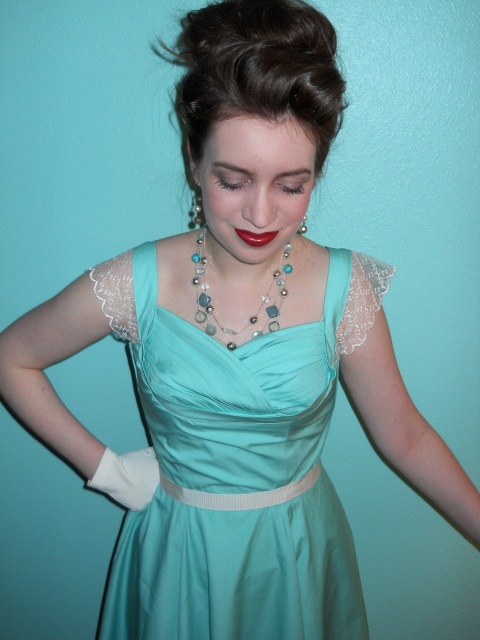
Well anyhow, as soon as I saw Butterick Pattern 5882 with its fitted, boned bodice complete with the “shelf bust” detail, I knew I just had to make a dress from it! The only thing was that the neckline was a little lower than I like to wear my dresses so I knew I’d need to do a few alterations. Overall, though, it wasn’t too tricky to alter! All I had to do was cut the curved neckline pieces longer than the pattern calls for, then continue the pleating throughout the extra fabric.
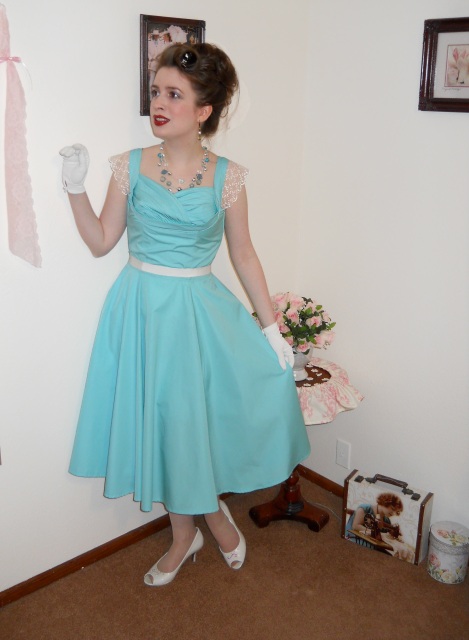
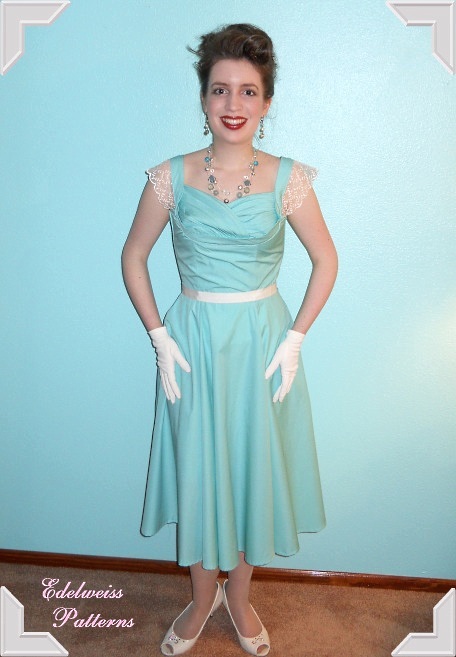
I loooooved this pattern! The skirt is full, though not quite as full as a circle skirt. It would look absolutely lovely with a crinoline petticoat underneath, too! Unfortunately my crinoline is not at home or I would have worn it – it’s currently at the Threads Magazine studio (along with another 1950s dress I sewed) being photographed for an upcoming summer 2013 issue. So when it comes back home I’ll have pictures taken with the petticoat underneath!
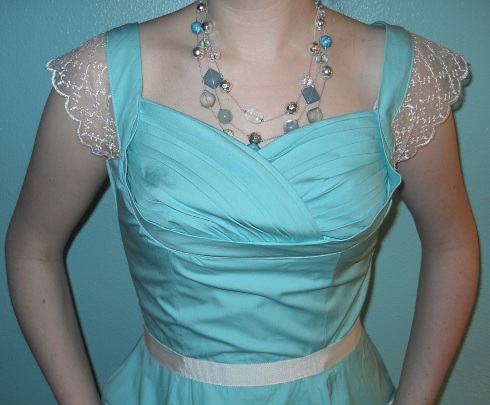
The dress bodice has the most beautiful pleating and detailing, and it is fully lined and boned. It has a back zipper closure and one long bias-cut strap that continues from the back shoulder to the front following the underbust seam, then the strap goes up the other shoulder where it finally comes back to the other side in the back.
For a number of years I’ve admired the gowns of famous 1950s ladies such as Mamie Eisenhower, Lucille Ball, and Rosemary Clooney who all wore elegant evening gowns with the “shelf bust” look just like this pattern has. For those of you who aren’t familiar with what a shelf bust is, it is a type of bodice with basically an empire waist seam, but the seam doesn’t quite come as low as an empire seam and it is “u” shaped. Up above the “u” is usually a pleated or ruched panel of fabric which has a lot more fullness than the tightly fitted bodice below, so you can see why it would have been popular in the 1950s when the hourglass look was favored.
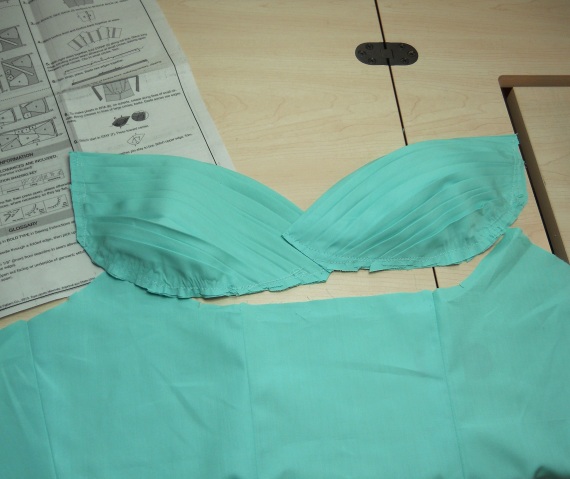
The only downside about a shelf bust is that it takes a lot of fitting to get just right – I think I spent about seven hours sewing this dress, not including the hour and a half to cut out the pattern and fabric. But if you take the extra time to fit your dresses you will be so much happier with the results!
Gertie has done a tremendous job with this pattern, and I’m so thankful for the creativity she has brought to Butterick’s Retro Patterns! I am really thrilled with the way this pattern fits, and the instructions are excellently written. On a scale of 1-10, I’d give this pattern a 9!
Besides making the neckline a little higher, the only other change I made was the addition of some tiny lace cap “sleeves” of sorts. In actuality they were just rectangles of embroidered organza lace which I stitched in place since I don’t usually wear lots of sleeveless dresses. Besides, I’ve found that wearing even a little bit of sleeves makes for a much more flattering bodice! When there is emphasis on your shoulders, it makes them look wider and makes your waist, in turn, look narrower. (In theory, at least!)
So that was my day today, and I am so happy to have made my goal of getting the first pattern review of B5882 online! Yippee! Speaking of new patterns, I’m hard at work for the “Liesl’s Edelweiss Dress” pattern and I’ll be sharing photos in the upcoming weeks.
Happy sewing!
Katrina
P.S. I know that usually I go “all out” with my retro photo shoots and generally have my pictures taken in vintage soda fountains shops, historic mansions, and elegant gardens, but since I had such a bad cold there was no way I could go out in the rainy weather today. Thus, I had to settle for using a corner of my spacious sewing studio as the backdrop, which I hope you will all forgive me for! Also, I wasn’t able to smile more in the photos because my face is a little sore. I’ll be back to normal soon, though!


Wow! How impressive the speed with which you whipped this up and all while being sick. It’s gorgeous. Love the addition of the little sleeves.
Man, I wish I could whip something up that fast! 😀
Oh, I love it! That bit of lace at the shoulders adds a lovely demure touch- you look angelic!
My goodness, you are a speedy seamstress. I could never finish anything that fast. It looks lovely. I’m so glad you raised the neckline and added sleeves. The first thing I thought when I saw this pattern was that it was way too low and I immediately dismissed it. I’m glad to know that you were able to modify it and make it look better. Shhhh, don’t tell Gertie.
[…] can read all about this project plus my pattern review here on my blog! I was so thrilled to get this version up and blogged about just three days after the design was […]
Jaw dropping gorgeous! The pattern looks great and I love how you made this dress with your own details. Very inspiring, and I’m looking forward to the day I will be able to make a dress like that someday.
Thank you guys! You are all too sweet. 🙂 I had a lot of fun sewing this dress, and I can hardly wait to wear it to spring occasions now!
This is a beautiful dress! I can hardly believe you finished it so fast.
I hope you feel better soon!
GORGEOUS! My first reaction was, “She looks just like a princess!” That, and I absolutely love the color you chose for it. I have to say, this is one of my favorite dresses on you to date. 😉 Awesome job, Katrina!
Oh, thank you, Alicia! That’s so sweet of you! It was a really fun dress to make, and I think I will get a lot of use out of it this spring and summer.
Have a blessed day!
Katrina
Wow, wonderful job! It’s just gorgeous!
Stunning!
Beautiful! I love everything about it. I loved the pattern when I saw it last week, and then I love it more with your modifications. I agree with a more modest neckline, and definitely agree with the lacy sleeve caps improving the proportions of shoulders to waist. And finally, the color! It is my favorite and flattering on so many people.
I must say that one would never know that you had a cold if you hadn’t mentioned it.
Thank you for this pattern review. I had seen the pictures of the pattern at a different website and immediately wrote it off as way too low cut. (You say that so much nicer than I do!) Anyway, seeing it the way you did it means that we might just need to purchase it! Happy Sewing!
Thank you, Kristen! To be entirely honest, I initially thought this pattern was not an option, either, but I sooo much wanted to try the newest 1950s pattern that I was quite determined to make it work. I do wish that pattern companies would make their pretty patterns much more modest, but if they don’t I guess we will just have to do that part for them!
Happy sewing!
Katrina
Nice! I am almost finished with mine and hope it will be as nice as yours is. Well done!
What a beautiful dress! Love the color, too. 🙂
Oh, Wow! Will you PLEASE do a tutorial on how you raised the neckline?
Hello, Brigid,
Thank you for your suggestion! That is a really excellent idea, since it did take quite a few steps to adjust. Besides just making the neckline higher, lengthening the entire top of the pieces also meant that it crossed over in the middle rather than meeting at center front. In addition, this means you have to change the way you attach the bodice to the straps.
For the forseeable next month or two most of my time is going to my next pattern project (Liesl’s Edelweiss Dress), but perhaps after that I can sew another version from this pattern and post a how-to tutorial on the blog!
Happy sewing,
Katrina
Hi, I’m currently making the dress & struggling with the shelf bust. I believe the pleated folds of the bra cups folds downward. (Is that correct? Yours appear folded upward).
Also, steps 12 & 13 have me all sorts of confused! Why do I need to baste that fold in step 12 when that part doesn’t touch/connect to the bodice in step 13? HELP! I think I’ve missed something…
Hi, Desiree!
Yes, it does look as if the pattern cover shows the pleats folded downwards. Why I folded them up, I can’t remember – but I’m sure it would look beautiful either way!
About step 12 and 13, I obviously had to sew mine differently since the bodice cups were so much longer than the original pattern. If you were following the instructions exactly, however, I believe they have you fold down the bodice so that it has more of a curved shape towards the outside of the bodice piece. But if I’m reading correctly, I think that part will connect to the bodice is step 13! It looks like if you don’t fold it down and baste, the bodice bust piece will be too long to fit into the lower assembled bodice.
If you still have more questions, I bet Gertie would be the perfect person to talk to since I think she wrote the instructions herself! You can contact her here: gertie (at) blogforbettersewing (dot) com.
Hope this helps!
Katrina
I’m making this same dress and Im new to sewing, could you possibly lend me some tips as to how you did the pleats in the bust? Im having a hard time with them :/
Thank you
Hi, Ashley! I’ll admit that these pleats were a little different than what I was used to! The trick to getting them to work is to press the two sides of the piece first (at the points marked on the pattern as pleat marks), then kind of stretching the middle material a little bit so the two different sized pleats on opposite ends can fold into one longer pleat. I steamed the middle of the pleats before I pressed them, because they were a little tricky to get perfect the first time. These are well worth the extra effort, though, so keep going! Happy sewing, ~ Katrina
love love love it!!!!!u did an awesome job….l love vintage patterns working on getting my vintage shape back so that when i make them they will look as good on me as they do on you…..
This design looks really good on you! I didn’t really like the idea of a shelf bust when I first saw the pattern. I think your adding a little more coverage made it look much better and probably more comfortable! Thanks for sharing!
Dear Katrina, Wow what a wonderful job you’ve done with this dress! It really looks fabulous and the delicate cap sleeves are like icing. On Gertie’s blog she explains that the long front strap should be sewn down on the bodice rather than up as the Butterick pictures and instructions have them. Nevertheless this dress looks so beautiful and I would have never thought to use a light blue color. Thank you again, so much!, for your posts on how to properly fit the Butterick 4790 wrap around apron style pattern! Yours are still the best instructions anywhere on that pattern!
Best wishes!